Welcome to the Basics Docker Container Workshop!!!
In this workshop, we will be practically learning the basics about container security. Docker containers are widely used in today’s Devops, CI/CD Integration etc world and many organizations are moving to adapt containers. With the new technologies there are loopholes coming-in and in order to secure containers, we need to understand how the containers work and how to defend them from the cyber security attacks. So let’s start the first part workshop:
What is Docker?
According to wikipedia, Docker is a set of platform as a service products that use OS-level virtualization to deliver software in packages called containers. Containers are isolated from one another and bundle their own software, libraries and configuration files; they can communicate with each other through well-defined channels.
In simple terms, Docker is a tool to perform operating system level virtualization which is also known as containerization.
It is used for creating, packaging and deploying applications.
Prerequisites for Docker Container basics Workshop:
The focus of this workshop is to ensure that everyone in the class can understand the basics of Docker Containers and how to build Docker Containers. Students attending the workshop should have basic understanding of Linux and Linux Commands. We want everyone attending the workshop to have the necessary setup installed prior to the session to avoid unnecessary delays.
Important: Please install Ubuntu~20.04.1 on either virtual machine or virtual box and make sure it has active internet connection.
Steps to install docker in VM:
-
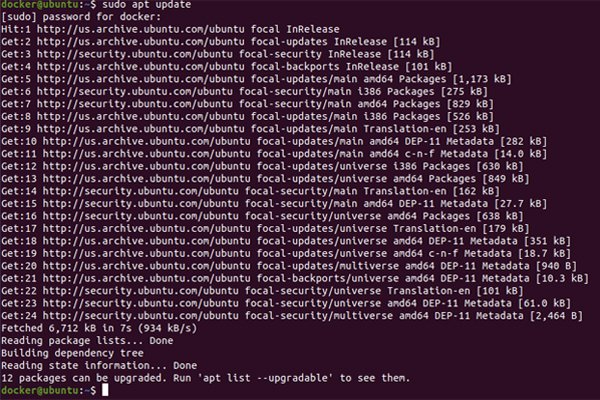
sudo apt update
-
sudo apt install docker.io
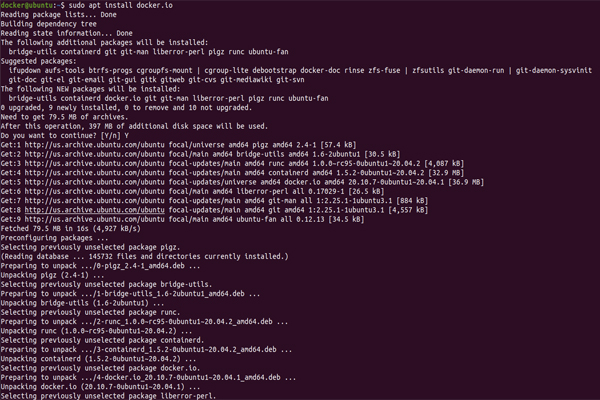
-
sudo systemctl start docker

-
Docker version

Why are we using Docker?
Here I will give a quick example about why docker containers are widely used.
-
Real World Scenario:
Let’s assume that I have a python application running on ubuntu, the python version used is 2.7 and has some python dependencies. Now one of the clients wants that application but he’s non technical and his system runs python 3.0. So for him to run the application he needs to either downgrade the python version to 2.7 and install all the dependencies and check if the application works and requires a lot of trouble shooting.
Now instead I make a docker image of the ubuntu and create my python app in the container then I share the image with the client which will help him to save storage and dependency issues.
Virtual Machine Vs Containers
|
Virtual Machine has its own Operating System and works as a separate machine whereas Docker uses host Operating System Linux Kernel which means that the container does not require a separate Operating system to work on. |
As Containers does not require a separate Operating system to work on, it reduces the storage space and in this way it allows to run any operating systems like Redhat, Ubuntu and Debian without thinking of any the original host(Linux Kernel the base OS) |
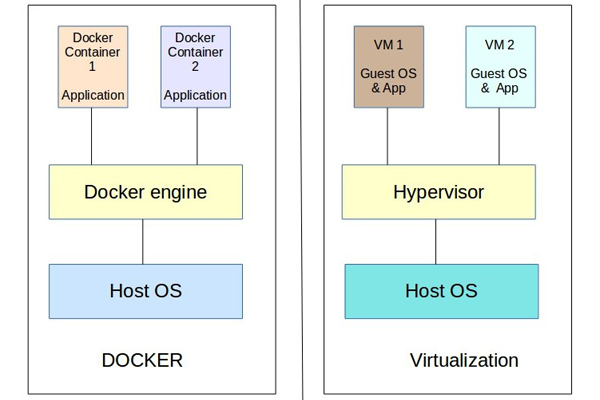
Reference: https://bobcares.com/blog/docker-vs-virtual-machines/
Building the first Docker Image using Dockerfile
Before building the dockerfile, let’s understand what is docker image, dockerfile and docker hub.
-
What is Dockerfile?
It has step by step instructions about how to create a docker image. It’s a kind of configuration file to build an image.
-
What is Docker Image?
Docker Image is used to create a running docker container.
-
What is Docker Hub?
Docker Hub is the largest database of publicly available container images.
Let’s build our first Dockerfile for calculator application having base Ubuntu 16.04:
-
In this example we will build a calculator application. Below screenshot shows there is no image locally available currently.

-
Let’s build a step by step docker image by using Dockerfile.

Code for Addition of Numbers:
| printf “First integer: “; read -r num1; printf “Second integer: “; read -r num2; printf “Their sum is: “; echo $(($num1+$num2)); |
Let’s understand what these instructions are all about:
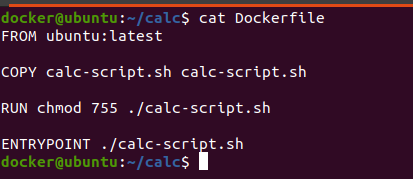
FROM: This instruction helps to tell the dockerfile which base image to use while creating the docker image. In the above example, we are using Operating System Ubuntu 16.04. Likewise you can use any other Operating systems like Fedora, Debian, Alpine etc.
CMD: CMD instruction allows you to set a default command, which will be executed only when you run a container without specifying a command.
WORDIR: WORKDIR instruction is used to set the working directory for all the subsequent Dockerfile instructions. You can imagine this as a “Cd” command as that of in linux.
ENTRYPOINT: The ENTRYPOINT instruction is used when you would like your container to run the same executable every time. Usually, ENTRYPOINT is used to specify the binary and CMD to provide parameters.
COPY: The COPY instruction helps to copy the file from the host machine to the image.
-
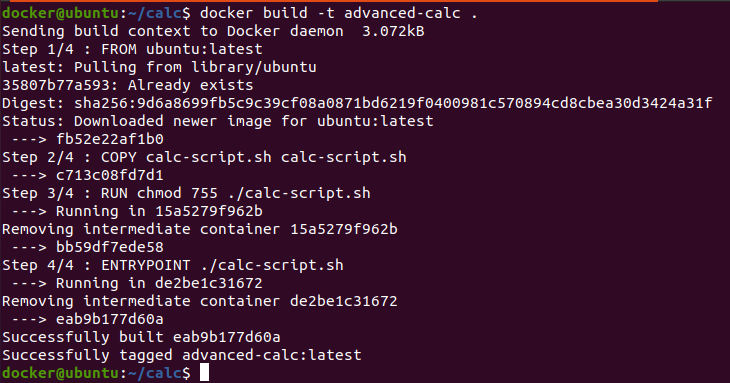
Lets run the above Dockerfile using docker build command.
Here “.” resembles the current working directory as our newly created Dockerfile is available in the current directory.
-t – Name and optionally a tag in the ‘name:tag’ format.

-
Let’s run the run docker images command to view the list of images. We can see that we received 2 newly created docker images i.e calc and Ubuntu 16.04.

-
Running the first Docker image. Lets run the docker container using docker run command. Here
-i : interactive mode and stdin is kept open
-t : allocate sudo tty.

-
Now that our docker container is up and running, let’s upload it on docker hub so that our client can have a look.
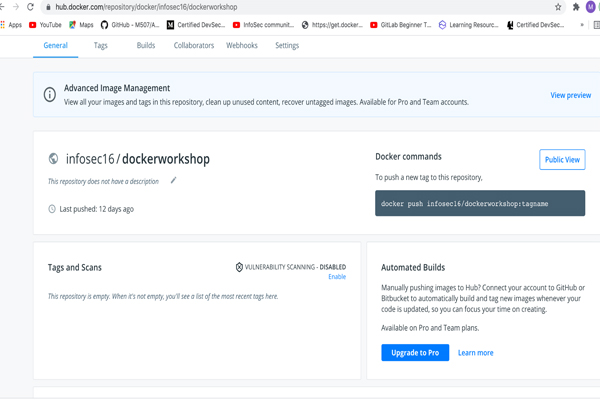
-
Login to the Docker hub using docker login command. Before that make sure that you have register to the Docker Hub.

-
Let’s push the docker image to docker hub for that we need to add additional tag name to our docker image i.e calc:latest

-
Push this newly created image to docker hub.


-
Docker image after uploading the docker image on to the docker hub.
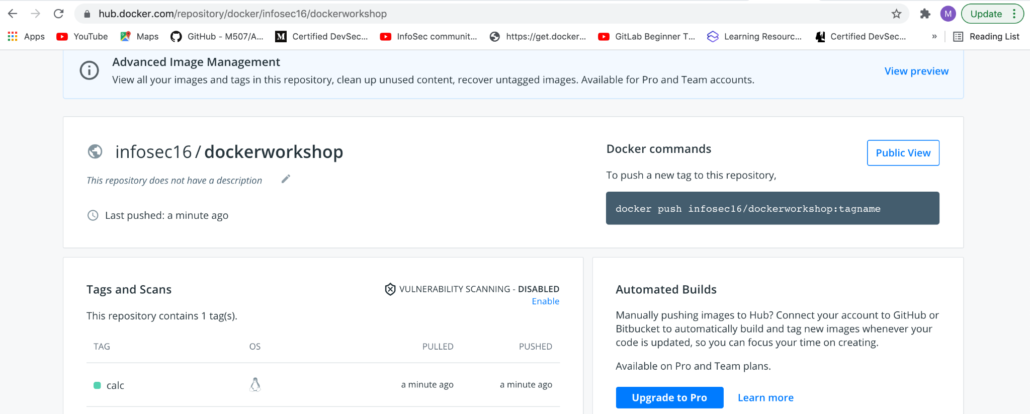
-
Remove the docker image which we uploaded on docker hub locally.

-
Let’s pull the same docker image from docker hub.

-
Next, we will take one more example of Dockerfile with more instructions. Let’s build a Dockerfile for creating calc with ubuntu:latest as base machine:
