Welcome to the Container Security Part 2 Workshop!!!
In part 2 workshop, we will be practically learning about how to build nginx docker image using Dockerfile and upload this image on our newly created local docker registry. Also we will understand why dockers use layers and few other docker features like docker volumes, docker inspect etc.
Building nginx docker image using Dockerfile
-
We will build a nginx docker image using Dockerfile.

Content of index.html file:

<html>
<body>
<h1>Welcome to part 2 docker security workshop</h1>
</body>
</html>
-
Now build the docker image using the below command:

List of docker images on our local machine:

-
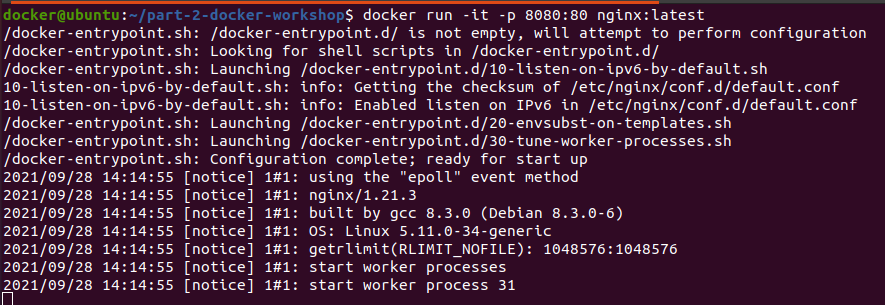
Run the newly created nginx docker image:


Let’s see what response we got in running stage of the container:

-
Another way to run the container:


Why does Docker use Layers?
Each step in the Dockerfile is considered as an individual layer while building a docker image. Each step in the Dockerfile creates an intermediate layer on the disk with relevant info.
If some of the layers are already used in previous docker image builds. These existing layers can be used instead of recreating it from scratch. This is the reason why docker uses multiple layers instead of using single layers.
Local Docker Registry:
-
Docker registry is a repository of Docker images from where you can pull and push images. Using a public registry is suitable for small scale development enterprises. But when it comes to large scale enterprise like E Commerce or Banking sectors, its best practice to have a self hosted local registry.

--restart: restart the container if it stops
--name: adding the tag name for the registry
-p: used for port mapping( host port:container-port)
“The first part of the -p value is the host port and the second part is the port within the container. Within the container, the registry listens on port 5000 by default.”
You can further read about registry on :
https://docs.docker.com/registry/deploying/
-
We can see that the registry container is running in the background.

-
We can see that the list of docker images:

-
In order to use the registry and push the images to it, we need to tag the image with the registry host:


-
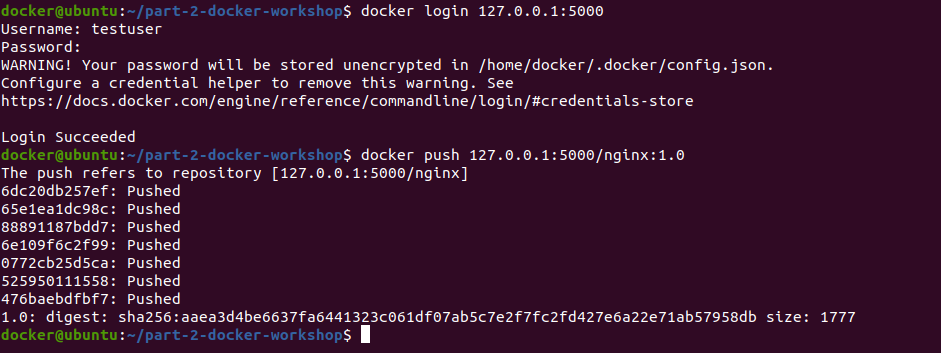
Upload the nginx:1.0 docker image to the local registry:

-
In order to check if the uploaded docker image on the registry is working, let’s remove the locally available docker image.


-
Try pulling the image from local registry:


Basic Authentication for the local registry:
Now that our registry is up and running, let’s see how we can secure the registry. One way of securing the registry is via basic authentication.
-
Create a directory named as basic-authentication:

-
To generate the credentials, run the below command:

-B Use bcrypt encryption (required)
-b run in batch mode
-n display results
-
Stop the registry container which was running previously:

-
Now the run registry using authentication enabled:

We can use the docker’s volume mounting feature to store data even after a container stops or is destroyed.
REGISTRY_AUTH_HTPASSWD_REALM: “YOUR REALM” : the Realm for your docker registry
REGISTRY_AUTH_HTPASSWD_PATH: ‘/httpasswd_storage/htpasswd’ : the full path to the htpasswd files containing your user:pass associations. This file will be shared between the host running your service and the service itself using the volumes definition
-
Now we can push and pull the images to the registry. But first we would login to the registry i.e 127.0.0.1:5000


-
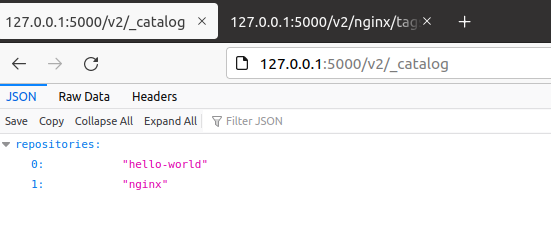
How to check via GUI if the docker image is uploaded to the registry or not:

-
To check the version of the docker image via GUI:

-
Curl command to check via terminal:


